
本文是继上一篇《CentOS支持IPv6》的后续文章,本文是通过HE.net提供的IPv6 Tunnel来获取虚拟的IPv6虚拟地址,也是我们应用Appstore过审的又一尝试。
具体步骤如下:
(1)登录 https://tunnelbroker.Net/,注册一个新用户。

按照需求如实填写即可,无需担心是否为国内用户。
(2)注册成功后、登录进去选择 User Functions 中的 Create Regular Tunnel

里面可以选择你个喜欢的地区
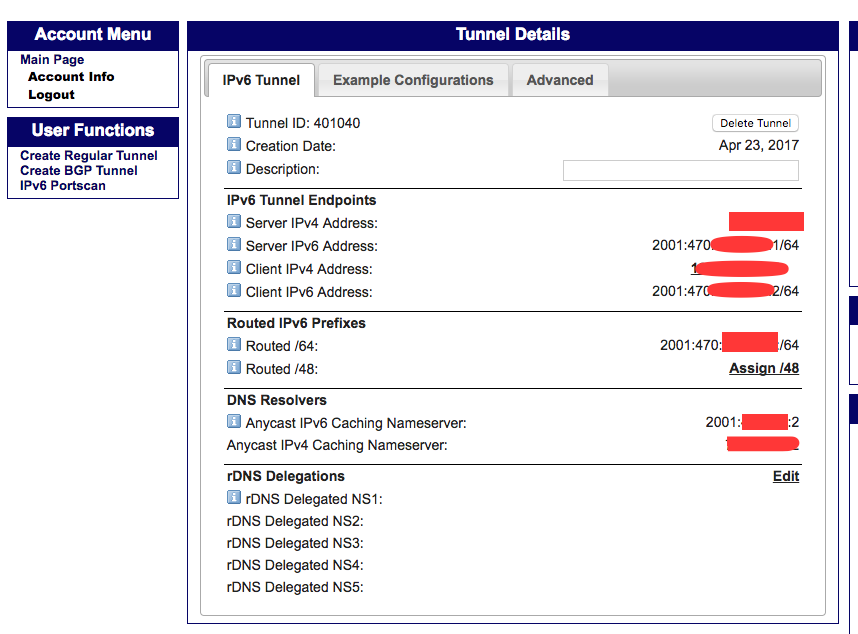
(3)输入你的服务器IP地址(需要是公网地址),然后可以看到你的tunnel信息:
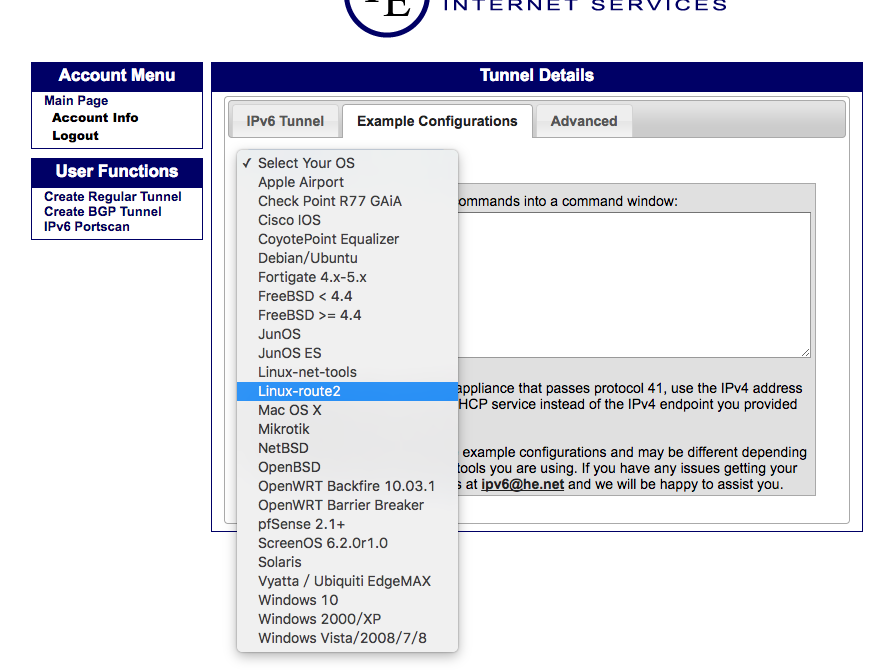
(4)点击Example Configurations,选择一个你的操作系统
(5)接下来可以配置你的Linux服务器了
如下命令是HE网站上Example Configurations的结果,我的是iproute模式
[root@sudops.com ~]# modprobe ipv6
[root@sudops.com ~]# ip tunnel add he-ipv6 mode sit remote 74.82.46.6 local 123.57.75.214 ttl 255
[root@sudops.com ~]# ip link set he-ipv6 up
[root@sudops.com ~]# ip addr add 2001:470:xx:xxxx::2/64 dev he-ipv6
[root@sudops.com ~]# ip route add ::/0 dev he-ipv6
[root@sudops.com ~]# ip -f inet6 addr
1: lo: <LOOPBACK,UP,LOWER_UP> mtu 65536
    inet6 ::1/128 scope host
       valid_lft forever preferred_lft forever
2: eth0: <BROADCAST,MULTICAST,UP,LOWER_UP> mtu 1500 qlen 1000
    inet6 fe80::216:xxxx:xxxx:xxxx/64 scope link
       valid_lft forever preferred_lft forever
3: eth1: <BROADCAST,MULTICAST,UP,LOWER_UP> mtu 1500 qlen 1000
    inet6 fe80::216:xxxx:xxxx:xxxx/64 scope link
       valid_lft forever preferred_lft forever
5: he-ipv6: <POINTOPOINT,NOARP,UP,LOWER_UP> mtu 1480
    inet6 2001:470:xxxx:xxxx::2/64 scope global
       valid_lft forever preferred_lft forever
    inet6 fe80::xxxx:xxxx/128 scope link
       valid_lft forever preferred_lft forever

[root@sudops.com ~]# ifconfig he-ipv6
he-ipv6   Link encap:IPv6-in-IPv4
          inet6 addr: 2001:470:xx:11xxxx3d::2/64 Scope:Global
          inet6 addr: fe80::xxxx:4xxxxbd6/128 Scope:Link
          UP POINTOPOINT RUNNING NOARP  MTU:1480  Metric:1
          RX packets:0 errors:0 dropped:0 overruns:0 frame:0
          TX packets:0 errors:0 dropped:0 overruns:0 carrier:0
          collisions:0 txqueuelen:0
          RX bytes:0 (0.0 b)  TX bytes:0 (0.0 b)

配置IPv6 DNS
[root@sudops.com ~]# vim /etc/resolv.conf
options timeout:1 attempts:1 rotate
nameserver x.x.x.x
nameserver x.x.x.x
nameserver 2001:4860:4860::8888
nameserver 2001:4860:4860::8844

测试是否可以ping通google的IPv6地址:
[root@sudops.com ~]# ping6 ipv6.google.com
PING ipv6.google.com(tsa03s01-in-x0e.1e100.net) 56 data bytes
64 bytes from tsa03s01-in-x0e.1e100.net: icmp_seq=1 ttl=55 time=387 ms
64 bytes from tsa03s01-in-x0e.1e100.net: icmp_seq=2 ttl=55 time=387 ms
64 bytes from tsa03s01-in-x0e.1e100.net: icmp_seq=3 ttl=55 time=387 ms
怎么样已经可以ping通IPv6地址了。
接下来可以配置 Nginx 和 DNS 的 AAAA 解析,然后让 IPv6 用户的访问可以进来,后续可参考后面的 Nginx 配置 IPv6 和 DNS 解析文章。
